What do you do when you feel like you have to sneeze during an on-camera interview? Here’s your two step process:
1. Camera off first.
2. Then, hit mute.
Nobody wants to see or hear you as you “ugly sneeze!”
—————————————-
Laura Bergells is a professional story finder. She writes, coaches, teaches, and speaks. Check out her online courses at LinkedIn Learning
🔥🔥🔥 Laura coaches executives on Camera via Zoom. When you need to rehearse an important presentation or prepare for a media interview, why not book a one-hour, online consultation?
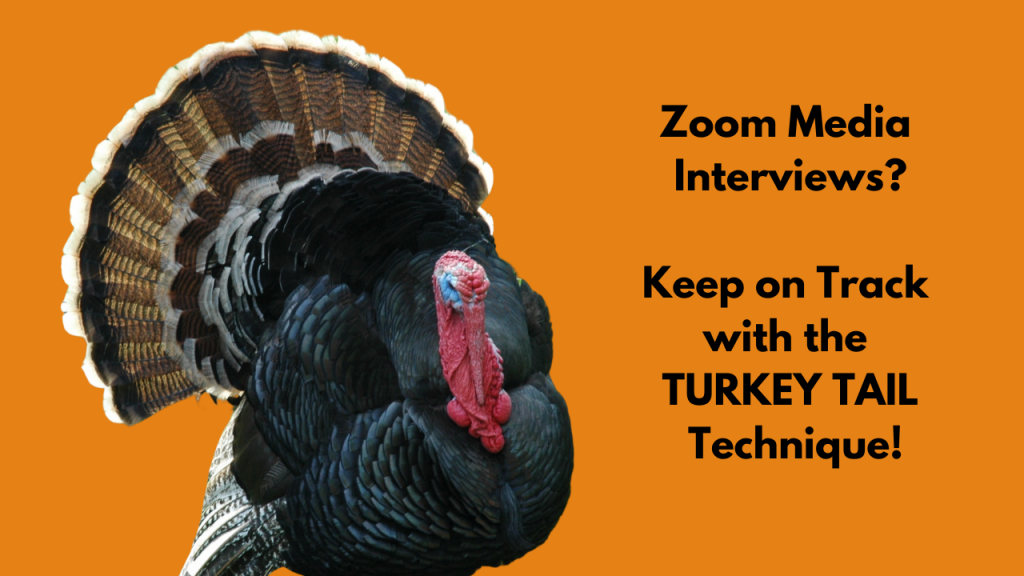
You need to maintain eye contact with a reporter or interviewer during an on-camera appearance. And yet, you need to cover your main talking points. And stick to an agenda and stay on time.
And you don’t want to have wandering or shifty eyes while you’re talking on-camera! What to do, what to do? How can you look at the camera and still keep focused on your main talking points?
Try using what I call ‘THE TURKEY TAIL TECHNIQUE.”
In the Turkey Tail, you put each agenda item or main talking point on one post it note. Stick the post it notes across your laptop or monitor. Fan the post it notes out like a Turkey Tail!
That way, you can subtly and evenly glance at your agenda items without having wild or wandering eyes. You can maintain good eye contact with the camera, and still keep on top of your agenda and main talking points.
Try the Turkey Tail Technique in your next Zoom interview or Zoom meeting
——————————————————-
Laura Bergells is a professional story finder. She writes, coaches, teaches, and speaks. Check out her online courses at LinkedIn Learning.
🔥🔥🔥 Laura also teaches “Presenting On Camera” – a live, interactive group class for sales and training professionals who need to shift from in-person to on-camera presentations. Call to inquire about availability and rates.
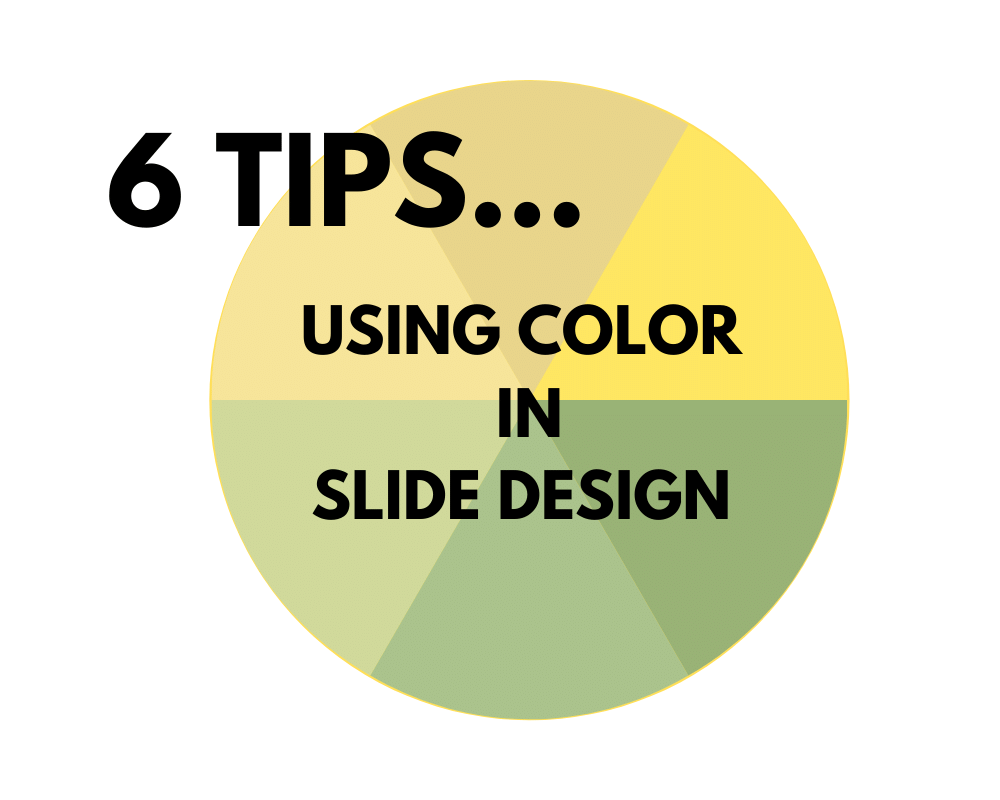
Color choices on your slides are important. People react to color on both a physical and emotional level.
Often, we see color on PowerPoint slides that don’t seem to have a purpose. Or worse, the color undermines the emotional intent of the message. Sometimes, setting constraints or following basic rules on colors can help you make better color choices.
Here are 6 quick tips that cover the basics of using color in slide design.
1. Use bright colors to attract + stimulate. Don’t use color merely for decoration. Use it for a purpose like drawing attention or setting a mood.
2. Use muted colors for reflection + contemplation. You don’t want to be in “attraction + stimulation” mode all the time. Think about the emotional content of color and how it can enhance learning outcomes.
3. Be careful about using too much color on one slide. It can be confusing. Remember the design concepts of contrast and sameness: without balance, you can create clutter and chaos.
4. Beware of bevels, gradients, and red text. They can be hard to see.
5. Check contrasts for accessibility. For those who are color blind or have photosensitivity, some colors may be difficult or impossible to see. Check contrasts at https://webaim.org/resources/contrastchecker/
6. Consider a limited, coordinated color palette. Pick one that meets your needs here: https://color.adobe.com/
What’s your fave quick tip for using color in slide design?
Laura Bergells is a professional story finder. She writes, coaches, teaches, and speaks. Check out her online courses at LinkedIn Learning.
If you’re a LinkedIn Premium or Lynda.com member, these courses are free! If you’re not a member, you can either become a member or buy each of these classes à la carte.
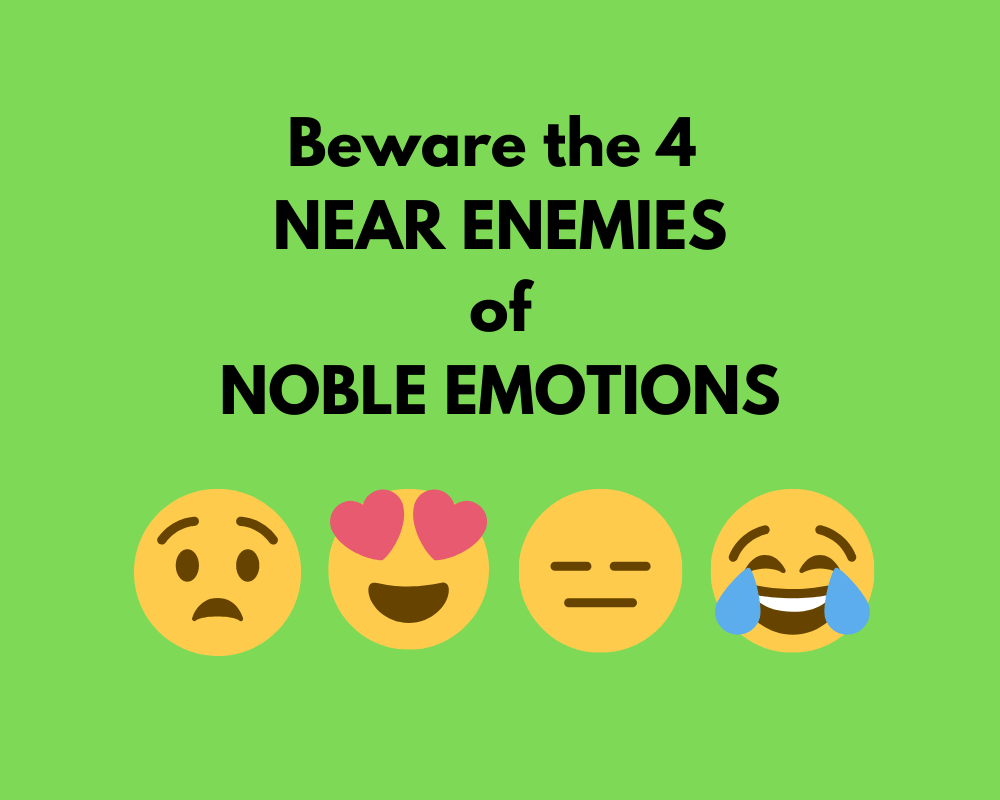
Let’s UNMASK four near enemies. A near enemy is a WICKED emotion that comes disguised as a NOBLE emotion.
Near enemies can be more dangerous than far enemies. That’s because far enemies are easy to spot.
For example, hate is the far enemy of love. Or sadness can be a far enemy of joy. Since it’s easy to detect a far enemy, you know what you’re dealing with.
But near enemies are tricky. They pose as noble emotions while destroying the noble emotion. Near enemies are so good at disguising themselves, you might even mistake a near enemy for a noble emotion.
These dangerous four enemies can TRICK others…and they can even TRICK you.
😟 Pity can look like Compassion.
😍 Codependence can look like Love.
😑Indifference can look like Equanimity.
😂 Exuberance can look like Sympathetic Joy.
Beware the 4 near enemies! Unmask them!
Practice self-awareness. Gain emotional intelligence.
Laura Bergells is a professional story finder. She writes, coaches, teaches, and speaks. Check out her online courses at LinkedIn Learning.
If you’re a LinkedIn Premium or Lynda.com member, these courses are free! If you’re not a member, you can either become a member or buy each of these classes à la carte.
In an attempt to make live presentations more accessible, I first used Closed Captioning in Google Slides for a presentation I gave around a year ago. Closed Captioning in Google Slides is easy to use and does a terrific job.
All you need is Google Slides, Google Chrome, a live internet connection, and a microphone. That’s it. In the above video, I show you how to activate it. The video is under a minute. It’s that easy.
But does it work? Yes. And it works really well.
I was in a room with about 100 people. The internet connection was steady but slow — and yet, Google translated what I said in real time with about 97% accuracy for a 45 minute presentation.
In the video above, you’ll see that I get 100% accuracy. This was a one-take video that I filmed on my laptop, at home, with a laptop mike. Nothing fancy.
But now I have a confession: even though I’ve established that Google Slides Closed Captioning for live presentations is a great tool: I still don’t use Closed Captioning for 100% of my presentations.
I don’t know what’s wrong with me. Old habits dying hard?
I felt bad about this, and vowed to do better in the future. I mean, WHY NOT make live presentations more accessible? Why not use it for EVERY live presentation?
And then, I was surprised that I got some pushback for wanting to make my live presentations more accessible.
“Not every presentation needs closed captioning, Laura,” came the naysayer. “Why not ask your audience whether they want it or not? After all, not everyone needs or wants Closed Captioning. It might be distracting.”
To those naysayers, I say this:
Remember when I said “old habits die hard?” I think that’s the case here. For the past year, I didn’t used closed captioning because it wasn’t my HABIT to do so. For years, I’ve been presenting live without closed captioning.
But if I use Closed Captioning every time I present, it will become a habit.
And to those who say, “…but not everyone needs it, so why not ask your audience if they want it or not?” — I have this to say:
These are early days in providing closed captioning. If you’re against it, it might simply because you’re not exposed to it. Once you become familiar with it, you might find you appreciate the visual support.
The last thing I want to do is make someone in my audience uncomfortable. To single them out. To make them admit, to a roomful of people that they need Closed Captioning.
Your day is coming. Someday, you might need to rely on Closed Captioning or other Assistive Technologies. When we design an inclusive experience, we’re improving the design for YOU.
In the future, I’ll do a better job of using Closed Captioning for my live presentations. I’ll get into the habit of using Google Slides with Closed Captioning for my presentations. If we have the technology, why not use it?
And if you use PowerPoint, it’s easy enough to run your show through Google Slides to give your audience a more inclusive experience. What else can we do to make our live presentations more accessible to our audiences?
Laura Bergells is a professional story finder. She writes, coaches, teaches, and speaks. Check out her online courses at LinkedIn Learning.
If you’re a LinkedIn Premium or Lynda.com member, these courses are free! If you’re not a member, you can either become a member or buy each of these classes à la carte.
Do you do “walk & talk” meetings at your organization?
One of my favorite times for a “walk & talk” is when I’m presenting research findings. If it all possible — due to the weather and other constraints — I want to get my clients out of the office and into nature.
My reasoning? Clients tend to want to dive into spreadsheets and data dashboards — while I want to keep the discussion on key findings.
My solution? Get them out of the office and into the woods!
While walking, I’ll present key findings and a summary. We can talk through any issues that come up.
And if clients want to dive into the data, they know it’s in the report. They can review it when we’re back in the office.
If you don’t want clients to get lost in the data — lost in the woods — why not try a walk and talk meeting?
Serve as a guide. Lead your audience out of the woods so they can see the whole forest!
When’s the last time you tried a “walk and talk” meeting? How did it work out?
Laura Bergells is a professional story finder. She writes, coaches, teaches, and speaks. Check out her online courses at LinkedIn Learning.
If you’re a LinkedIn Premium or Lynda.com member, these courses are free! If you’re not a member, you can either become a member or buy each of these classes à la carte.
How do you get a QR code of your LinkedIn profile? You can do it directly from within LinkedIn!
I often put a QR code that leads to my LinkedIn profile on or near the last slide of my presentation. I sometimes will put one in a video.
With a QR code that leads to my LinkedIn profile, an audience member can scan the code and connect with me on LinkedIn, if they wish.
A few people asked me how to get their own QR code to use in their presentations and videos — and the answer is that it’s available right from within LinkedIn!
In this short video, (45 seconds) I show you how to create and scan a LinkedIn QR code.
If you feel so inclined, feel free to connect with me on LinkedIn. Scan the code in the video, and you’ll go straight to my profile!
Laura Bergells is a professional story finder. She writes, coaches, teaches, and speaks. Check out her online courses at LinkedIn Learning.
If you’re a LinkedIn Premium or Lynda.com member, these courses are free! If you’re not a member, you can either become a member or buy each of these classes à la carte.
As a stand & deliver trainer, I have oodles of presentation content. Canva lets me repurpose bits and pieces of this content for easy social media sharing.
Yes, Canva excels at quick online video creation. I’m finding a lot of people use Canva — but we tend not to think of using it for video. We tend to think of it for images.
I’m also thinking a lot of people have PowerPoint presentations. Why not try using Canva to repurpose your presentation content for social media posts?
Canva lets you do this in a way that’s super easy to accomplish. I show you how in this two minute video. Enjoy!
Laura Bergells is a professional story finder. She writes, coaches, teaches, and speaks. Check out her online courses at LinkedIn Learning.
If you’re a LinkedIn Premium or Lynda.com member, these courses are free! If you’re not a member, you can either become a member or buy each of these classes à la carte.
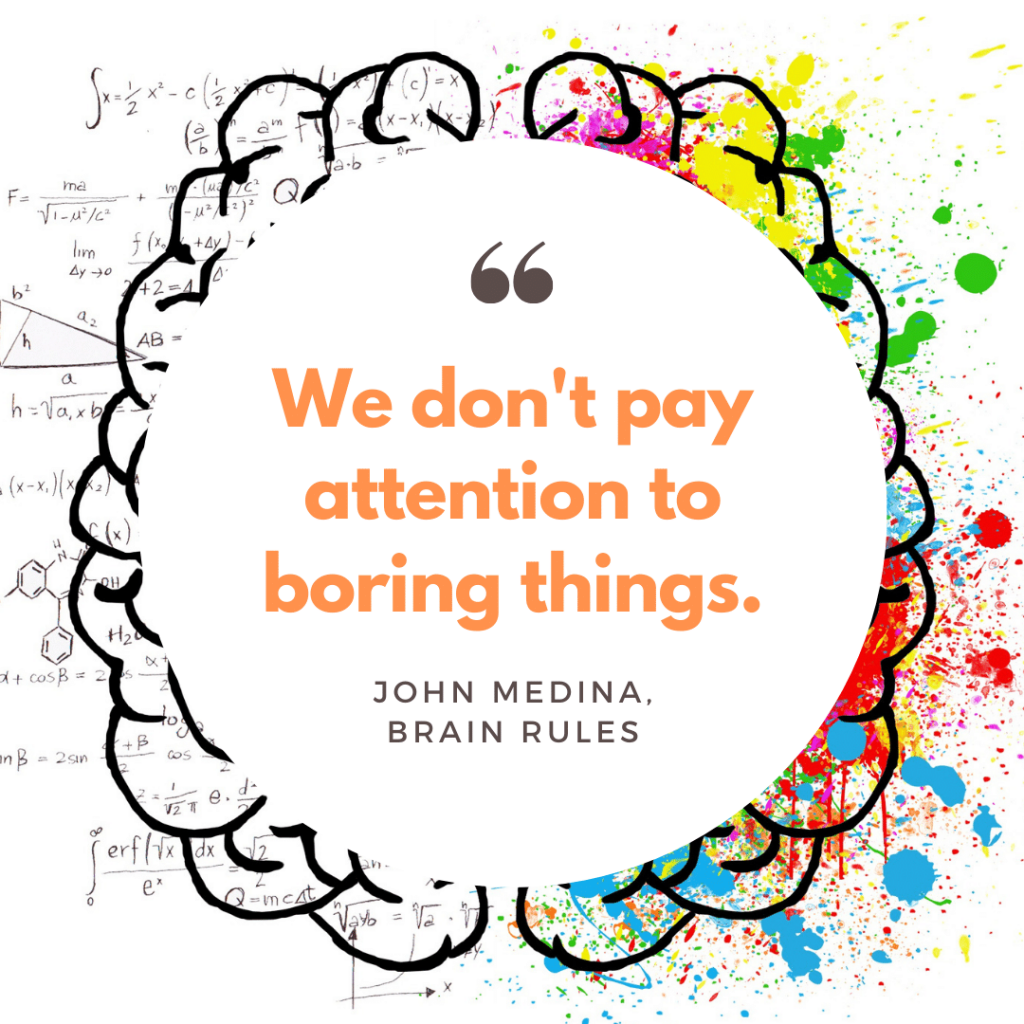
But how do you NOT be boring when you’re speaking or presenting?
Medina tells us to be sure to introduce something emotionally relevant every 10 minutes.
At least every 10 minutes!
If we don’t, we risk losing the attention and interest of our audiences….because….
“We don’t pay attention to boring things.”
What can you do to shake things up for your audience?
Click on the video to discover 5 things you can do…in under 51 seconds!
Laura Bergells is a professional story finder. She writes, coaches, teaches, and speaks. Check out her online courses at LinkedIn Learning.
If you’re a LinkedIn Premium or Lynda.com member, these courses are free! If you’re not a member, you can either become a member or buy each of these classes à la carte.